The basic installation and configuration of Cloudflare are described here: Installation of a Web Server on mikr.us Using MariaDB and MyISAM Engine
In this tutorial, we will focus on configuring a full strict connection between your server and Cloudflare.
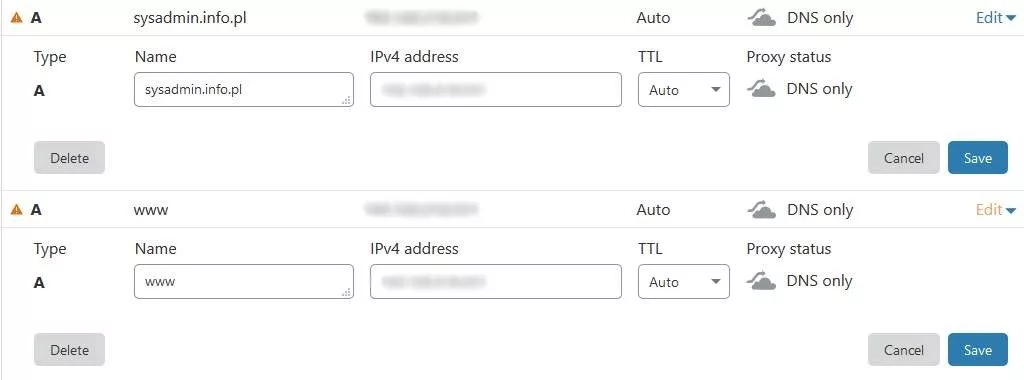
For the purposes of this tutorial and initial testing, you should first disable the orange cloud icon (click on it) in the DNS section of your domain on Cloudflare so that it becomes gray, and save the changes using the save button. This way, you can verify whether the Let’s Encrypt certificate has been correctly installed, and every browser shows that your website is using SSL and a certificate from Let’s Encrypt.

Instead of an A record for www, you can have a CNAME record. I simply have a vhost on www that does a redirect. Instead of the domain name, you can use the @ symbol in the target field.

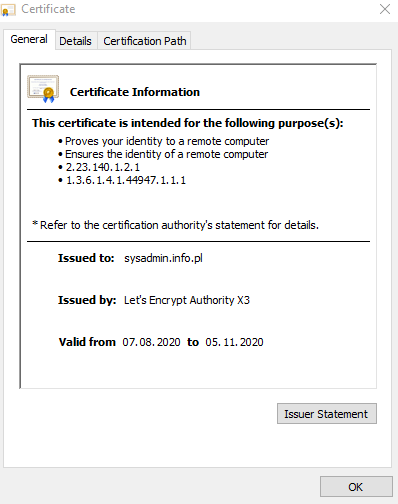
You need to click on the padlock icon next to the website address in the address bar and select the option to show the certificate. Yes, I know, these are basics, but this is how you can check it.

If the website shows that it has a Let’s Encrypt certificate, that’s great.
Now, let’s proceed with the actual configuration.
You need to log in to your server via SSH and navigate to the /etc/letsencrypt/csr directory, then list the contents of the directory.
|
|
You will see a list of files like the example below. Certbot assigns consecutive numbers when refreshing the certificate for the site.
|
|
You can check which file has the latest date using the ll command (two letter “l"s). Logically, it will be the one with the highest number. Display its contents using the cat command.
Or you can check it with this command:
|
|
|
|
Copy the entire contents of this file, including the lines “begin certificate request” and “end certificate request.”
Go to the SSL/TLS -> Origin server section on Cloudflare.
Click the “create certificate” button, select that you have your own certificate (“I have my own private key and CSR”). Paste the previously copied pem file content into the field labeled “paste certificate signing request” and set the certificate validity to 90 days, as Let’s Encrypt provides the same duration.
It’s best to copy and paste this CSR pem file in the Cloudflare section immediately after generating the SSL certificate for your site using Certbot.
After pasting the content, click “next.” Cloudflare will generate the private key.
Copy the content of this private key and paste it, for example, into the file /etc/pki/tls/certs/origin-pull-ca.pem.
|
|
Click “insert” and right-click to paste the previously copied content from the clipboard.
Then press “Esc” on the keyboard and type :wq to save the file and exit the terminal.
Next, execute the following commands to set the file owner as root and give it the appropriate permissions.
|
|
In Cloudflare, leave the domains as proposed.
In the SSL/TLS -> Origin server section, there is an option for “Authenticated Origin Pulls”; you must enable it by sliding the switch to the “On” position.
We have one last matter to address.
I will describe my case for CentOS 7 and Apache, but there is also documentation for Nginx available here:
Authenticated Origin Pulls - Cloudflare Support
In CentOS, you need to go to the directory: /etc/httpd/conf.d and edit the ssl.conf file.
|
|
Set the values as provided in the above Cloudflare address. Remove the hash and change 10 to 1 for the SSLVerifyDepth option. Set the value to “require” for the SSLVerifyClient option. Then provide the path to the private key file generated by Cloudflare for the SSLCACertificateFile option.
It should look like this, for example:
|
|
After saving the changes in this file, restart the Apache/Nginx service using the following command:
|
|
Then in the DNS section, enable the orange cloud icon and set encryption to “full strict” in the SSL/TLS section. This way, encryption has been enabled between the Cloudflare server and yours.
The only problem is repeating this operation every 90 days when Certbot refreshes the Let’s Encrypt certificate.
The second option is with Cloudflare. You generate a certificate from Cloudflare, but then you use their pem file. You need to place the private and public key in that SSL file I mentioned earlier. I know it’s a bit complicated. But the plus side is that you have a certificate for 15 years for communication between the Cloudflare server and yours. If you want me to describe the second method in detail, let me know.
Useful links: